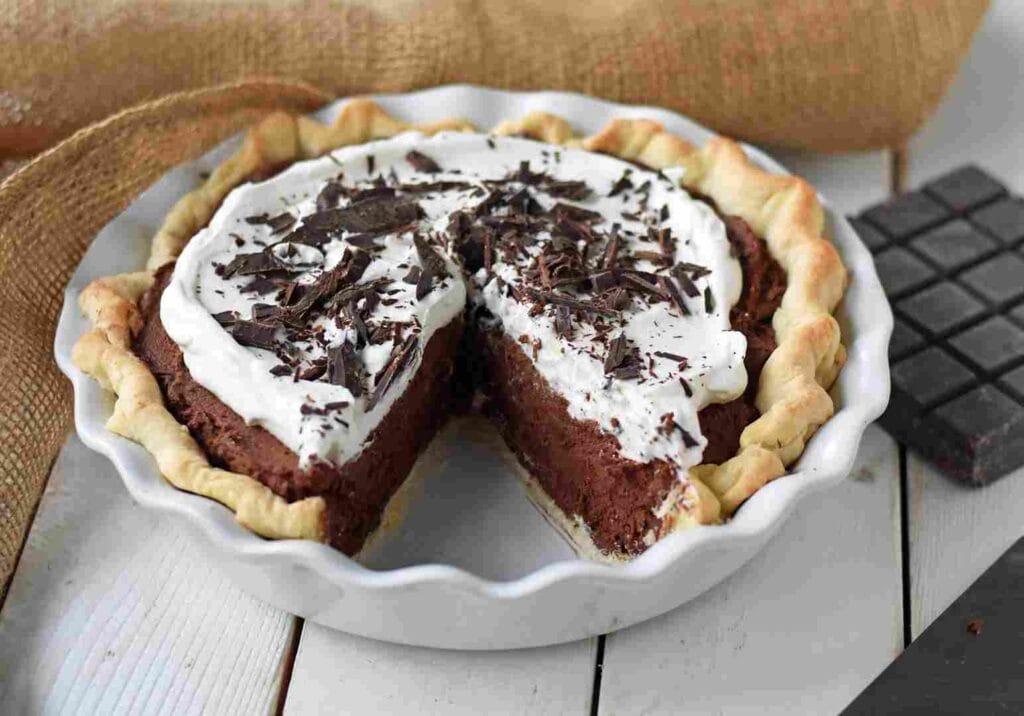
Who doesn’t crave a slice of rich, creamy chocolate pie? Absolutely scrumptious! It’s a classic dessert that I’ve perfected over the years, and today I’m thrilled to share my secrets with you. This chocolate pie recipe not only offers deep, luxurious chocolate flavors but also brings simplicity to your kitchen, making it achievable for anyone with a sweet tooth and a whisk.

Recipe Overview
- Course: Dessert
- Cuisine: American
- Total Servings: 8
- Prep Time: 20 minutes
- Cook Time: 30 minutes
- Total Time: 50 minutes
Kitchen Equipment Needed
When making a chocolate pie, having the right tools can make or break your culinary venture. Here’s what you’ll need:
- Mixing bowls
- Whisk
- Rolling pin
- Pie dish
- Saucepan
- Measuring cups and spoons
Ingredients
Here’s what you’ll need to create the ultimate chocolate pie:
| Ingredient | Quantity |
|---|---|
| Dark chocolate, chopped | 200g |
| Heavy cream | 1 cup |
| Sugar | 3/4 cup |
| Butter, unsalted | 1/4 cup |
| Eggs, large | 3 |
| Vanilla extract | 1 tsp |
| Salt | 1/4 tsp |
| Pie crust (pre-made) | 1 |
Did you know? The use of dark chocolate in pies dates back to the 19th century when it was a luxury item in desserts.
Step by Step Instructions
Step 1 – Prepare the Pie Crust
- Place your pie crust in the pie dish.
- Using a fork, prick the crust gently to prevent bubbling.
- Pre-bake the crust in a preheated oven at 350°F (175°C) for 10 minutes.
Note: Pre-baking the crust helps to prevent sogginess once the filling is added.
Step 2 – Make the Chocolate Filling
- In a saucepan, combine the heavy cream, sugar, and butter.
- Heat over medium until the butter melts and the mixture is well combined.
- Remove from heat and add the chopped dark chocolate. Stir until smooth.
- Whisk the eggs, vanilla extract, and salt in a separate bowl. Gradually add to the chocolate mixture.
Warning: Ensure the chocolate mixture is not too hot when adding the eggs to avoid scrambling them.
Step 3 – Bake the Pie
- Pour the chocolate filling into the pre-baked crust.
- Bake at 350°F (175°C) for 20 minutes or until the filling is set.
- Allow the pie to cool completely before slicing.
Note: The center should still wobble slightly when taken out of the oven; it will set as it cools.
Additional Tips
- For a glossy finish, brush the pie with a light syrup glaze after baking.
- Allow the pie to set in the fridge for at least 4 hours for best texture.
Pairing Suggestions
Pair this decadent dessert with a dollop of whipped cream or a scoop of vanilla ice cream. Here are a few more pairing ideas:
- Fresh berries
- Mint leaves
- Coffee
Nutritional Information
| Nutrient | Amount per serving |
|---|---|
| Calories | 450 kcal |
| Carbohydrates | 50g |
| Protein | 6g |
| Fat | 25g |
| Saturated Fat | 15g |
| Cholesterol | 96mg |
| Sodium | 220mg |
| Fiber | 3g |
Approximation: These values are approximations and may vary based on specific ingredient choices.
Dietary Information
This chocolate pie recipe is suitable for vegetarians. For a gluten-free version, use a gluten-free pie crust and check that all other ingredients are certified gluten-free.
FAQs about Chocolate Pie
Is chocolate pie suitable for freezing?
Yes, you can freeze the pie for up to 3 months. Wrap it tightly in cling film or aluminum foil.
Can I use milk chocolate instead of dark chocolate?
Absolutely! If you prefer a sweeter, creamier taste, milk chocolate is a perfect substitute.
What’s the best way to serve chocolate pie?
Serve chilled or at room temperature, depending on your preference. Both offer a unique taste experience.
How do I know when the pie is done baking?
The pie should have a slight jiggle in the center; it will firm up as it cools.
Can I make this pie without eggs?
For an egg-free version, substitute with a silken tofu blend or a commercial egg replacer.
What are the signs of overbaking?
If the edges start to crack or the filling puffs up too much, it’s likely overbaked.
Can I make the pie crust from scratch?
Yes, for a homemade touch, mix flour, cold butter, and a little salt to create your crust.
Conclusion
There you have it—my go-to chocolate pie recipe that never fails to impress. It’s rich, luscious, and absolutely a crowd-pleaser at any gathering. Remember, the key to a perfect chocolate pie lies in the quality of chocolate and a bit of patience. Now, it’s your turn to whip up this delight and wow your guests!
Feel free to leave any comments, questions, or feedback on this chocolate pie recipe. Your thoughts are always welcome!
Check out some more delicious dessert recipes:
- Apple Cobbler Recipe
- Fruit Dip Recipe
- Cookie Dough Recipe
- Funnel Cake Recipe
- Rice Pudding Recipe
- Rice Krispie Treat Recipe

Chocolate Pie Recipe
Equipment
- Mixing bowls
- Whisk
- Rolling Pin
- Pie dish
- Saucepan
- Measuring cups and spoons
Ingredients
- 200 g Dark chocolate chopped
- 1 cup Heavy cream
- 3/4 cup Sugar
- 1/4 cup Butter unsalted
- 3 large Eggs
- 1 tsp Vanilla extract
- 1/4 tsp Salt
- 1 Pie crust pre-made
Instructions
Step 1 – Prepare the Pie Crust
- Place your pie crust in the pie dish.
- Using a fork, prick the crust gently to prevent bubbling.
- Pre-bake the crust in a preheated oven at 350°F (175°C) for 10 minutes.
- Note: Pre-baking the crust helps to prevent sogginess once the filling is added.
Step 2 – Make the Chocolate Filling
- In a saucepan, combine the heavy cream, sugar, and butter.
- Heat over medium until the butter melts and the mixture is well combined.
- Remove from heat and add the chopped dark chocolate. Stir until smooth.
- Whisk the eggs, vanilla extract, and salt in a separate bowl. Gradually add to the chocolate mixture.
- Warning: Ensure the chocolate mixture is not too hot when adding the eggs to avoid scrambling them.
Step 3 – Bake the Pie
- Pour the chocolate filling into the pre-baked crust.
- Bake at 350°F (175°C) for 20 minutes or until the filling is set.
- Allow the pie to cool completely before slicing.
- Note: The center should still wobble slightly when taken out of the oven; it will set as it cools.
Notes
- For a glossy finish, brush the pie with a light syrup glaze after baking.
- Allow the pie to set in the fridge for at least 4 hours for best texture.


Leave a Reply