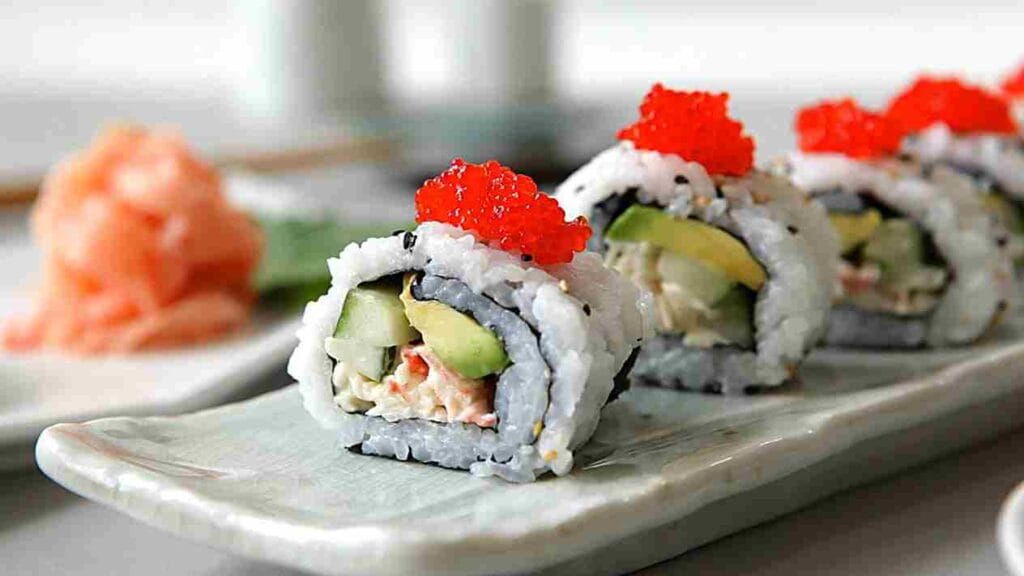
I’ve always had a soft spot for sushi, and among the varieties, kani sushi holds a special place on my palate. Its simplicity, paired with the sweet and delicate flavor of imitation crab, makes it a standout dish that’s surprisingly easy to prepare at home. Today, let’s dive into how you can bring this Japanese favorite right into your kitchen with just a few essential steps.
Recipe Overview
- Course: Appetizer
- Cuisine: Japanese
- Total Servings: 4
- Prep Time: 15 minutes
- Cook Time: 20 minutes
- Total Time: 35 minutes
Kitchen Equipment Needed
Before we start rolling our kani sushi, ensure you have the following tools ready. It’s these small tools that make or break a good sushi session.
- Bamboo sushi mat
- Sharp knife
- Rice cooker or pot
- Mixing bowl
- Measuring cups
Ingredients
| Ingredient | Quantity |
|---|---|
| Sushi rice | 1 cup |
| Water | 1 cup |
| Rice vinegar | 2 tablespoons |
| Sugar | 1 tablespoon |
| Salt | 1 teaspoon |
| Nori sheets | 4 sheets |
| Kani (imitation crab) | 8 sticks |
| Cucumber | 1 medium, julienned |
| Avocado | 1 sliced |
| Sesame seeds (optional) | 1 tablespoon |
Did you know? Kani means crab in Japanese, and while we use imitation crab here, this dish mimics the flavor of the real deal quite impressively!
Step by Step Instructions
Step 1: Prepare the Sushi Rice
- Rinse the sushi rice under cold water until the water runs clear.
- Cook the rice according to your cooker’s instructions or on the stove.
- Once cooked, mix in rice vinegar, sugar, and salt while the rice is still warm.
Note: It’s crucial to season your sushi rice while it’s warm to ensure the seasoning is absorbed properly.
Step 2: Ready the Nori Sheets
- Cut the nori sheets in half. This size is perfect for a standard kani roll.
Step 3: Lay the Foundation
- Place a half sheet of nori on your bamboo mat, shiny side down.
- Wet your fingers to prevent sticking and spread a thin layer of sushi rice over the nori, leaving a small margin at the top edge.
Step 4: Add the Fillings
- Line up a couple of kani sticks along the bottom edge of the rice.
- Add a few strips of cucumber and a couple of slices of avocado next to the kani.
Warning: Don’t overfill your sushi roll; it makes it harder to roll tightly!
Step 5: Roll it Up
- Start rolling using the bamboo mat, pressing forward to make the roll tight.
- Once rolled, squeeze the roll gently with the mat to seal everything together.
Fact: Sushi originated as a fast food in Tokyo around the 1820s, designed to be eaten on the go!
Step 6: Slice and Serve
- Using a sharp knife, cut the roll into six even pieces.
- Sprinkle with sesame seeds for an added touch of flavor and texture.
Additional Tips
- Wet your knife: Before slicing your sushi roll, dampen your knife with a bit of water to prevent sticking.
- Chill the rice: Slightly cooling the rice before spreading can make it less sticky and easier to handle.
Pairing Suggestions
While kani sushi is fantastic on its own, it pairs beautifully with:
- Soy sauce for dipping
- Pickled ginger as a palate cleanser
- A small dish of wasabi
Nutritional Information
| Nutrient | Amount per serving |
|---|---|
| Calories | 210 kcal |
| Protein | 6 g |
| Carbohydrates | 38 g |
| Fat | 5 g |
Approximation: These values are approximate and can vary based on specific ingredient choices.
Dietary Information
This kani sushi recipe is wonderfully adaptable for various diets. It’s inherently low in fat and, without the avocado, can suit even lower-fat diet preferences.
FAQs about Kani Sushi
What can I use instead of kani?
If you’re not a fan of imitation crab, try substituting it with cooked shrimp or even tofu for a vegetarian twist.
How do I make my sushi rice more flavorful?
Consider adding a piece of kombu (dried kelp) to your cooking water for an umami boost.
Can kani sushi be made in advance?
Yes, but it’s best enjoyed fresh. If you must, tightly wrap it in cling film and refrigerate for up to 24 hours.
Is kani sushi healthy?
Yes, it is a balanced mix of carbs, protein, and healthy fats, especially when loaded with veggies.
How can I prevent sushi rice from sticking to my hands?
Keep a bowl of water with a splash of vinegar handy to dip your fingers as you work.
Can kids help make kani sushi?
Absolutely! It’s a fun and interactive way to introduce them to cooking and different cultures.
What are the best drinks to serve with kani sushi?
Green tea or a light, crisp white wine complements the flavors beautifully.
Conclusion
Creating kani sushi at home is a rewarding experience that not only fills your stomach but also expands your culinary skills. It’s about precision, the freshness of ingredients, and the joy of sharing a meal you’ve crafted with your own hands.
Feel free to leave comments, questions, or feedback on this recipe. I’d love to hear how your kani sushi turned out and any personal twists you added to make it your own!
Check out some more delicious appetizer recipes:
- White Trash Recipe
- Chicken Sliders Recipe
- Mini Tacos Recipe: A Mouthwatering Treat
- Salmon Bites Recipe
- Pineapple Black Bean Salsa Recipe
- Guinness Cheese Recipe
Kani Sushi Recipe
Equipment
- Bamboo sushi mat
- Sharp knife
- Rice cooker or pot
- Mixing bowl
- Measuring cups
Ingredients
- 1 cup Sushi rice
- 1 cup Water
- 2 tablespoons Rice vinegar
- 1 tablespoon Sugar
- 1 teaspoon Salt
- 4 sheets Nori sheets
- 8 sticks Kani imitation crab
- 1 medium Cucumber julienned
- 1 Avocado sliced
- 1 tablespoon Sesame seeds optional
Instructions
Step 1: Prepare the Sushi Rice
- Rinse the sushi rice under cold water until the water runs clear.
- Cook the rice according to your cooker’s instructions or on the stove.
- Once cooked, mix in rice vinegar, sugar, and salt while the rice is still warm.
- Note: It’s crucial to season your sushi rice while it’s warm to ensure the seasoning is absorbed properly.
Step 2: Ready the Nori Sheets
- Cut the nori sheets in half. This size is perfect for a standard kani roll.
- See also Hook and Reel Sauce Recipe
Step 3: Lay the Foundation
- Place a half sheet of nori on your bamboo mat, shiny side down.
- Wet your fingers to prevent sticking and spread a thin layer of sushi rice over the nori, leaving a small margin at the top edge.
Step 4: Add the Fillings
- Line up a couple of kani sticks along the bottom edge of the rice.
- Add a few strips of cucumber and a couple of slices of avocado next to the kani.
- Warning: Don’t overfill your sushi roll; it makes it harder to roll tightly!
Step 5: Roll it Up
- Start rolling using the bamboo mat, pressing forward to make the roll tight.
- Once rolled, squeeze the roll gently with the mat to seal everything together.
- Fact: Sushi originated as a fast food in Tokyo around the 1820s, designed to be eaten on the go!
Step 6: Slice and Serve
- Using a sharp knife, cut the roll into six even pieces.
- Sprinkle with sesame seeds for an added touch of flavor and texture.
Notes
- Wet your knife: Before slicing your sushi roll, dampen your knife with a bit of water to prevent sticking.
- Chill the rice: Slightly cooling the rice before spreading can make it less sticky and easier to handle.


Leave a Reply