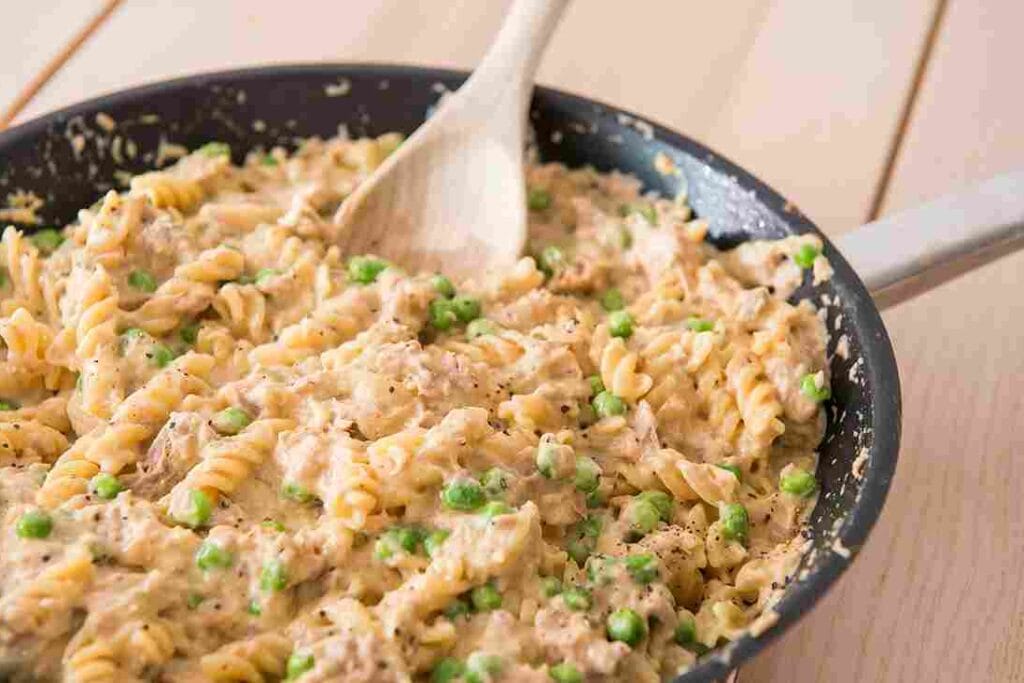
Gone are the days of bland and uninspiring meals; let’s talk about a dish that packs a punch in the flavor department without chaining you to the kitchen for hours. Tuna Helper has been a saving grace for busy home chefs everywhere, offering a delightful blend of convenience and taste that can turn a simple dinner into a special occasion. Now, I’ve taken this classic and dialed up the flavor with some kitchen magic and a few tricks up my sleeve. So grab your apron, and let’s get cooking!

Tuna Helper Recipe Overview
- Course: Main Dish
- Cuisine: American
- Total Servings: 4
- Prep Time: 10 minutes
- Cook Time: 20 minutes
- Total Time: 30 minutes
Kitchen Equipment Needed
Before diving into the cooking process, make sure you have the following tools on hand to whip up this fantastic tuna helper dish:
- Large skillet
- Measuring cups and spoons
- Wooden spoon or spatula
- Strainer
Now, why do I emphasize these? Because they are crucial to ensuring that your dish turns out just right. Nobody likes a mushy tuna helper, and the right tools can make all the difference!
Ingredients
Let’s ensure our pantry is stocked with the right stuff. Here’s what you’ll need:
| Ingredient | Quantity |
|---|---|
| Canned tuna | 2 cans (drained) |
| Pasta (elbow macaroni or similar) | 2 cups |
| Milk | 1 cup |
| Water | 1 cup |
| Butter | 2 tablespoons |
| Cheddar cheese (shredded) | 1 cup |
| Frozen peas | 1 cup |
| Onion powder | 1 teaspoon |
| Garlic powder | 1 teaspoon |
| Salt | To taste |
| Pepper | To taste |
Did you know? Tuna is not only delicious but also packed with omega-3 fatty acids, which are great for heart health. Adding it to your diet can be a tasty way to boost your nutrient intake.
Step by Step Instructions
Step 1 – Prep the Pasta
- Cook the pasta according to package instructions until it’s just al dente. Remember, it’s going to cook a bit more when we mix it with the sauce.
Note: Always salt your pasta water – it’s your only chance to flavor the pasta itself!
Step 2 – Sauté the Spices
- In the same skillet, melt the butter over medium heat.
- Add the onion and garlic powder, sautéing until fragrant. This will form the flavor base of our dish.
Step 3 – Combine Ingredients
- Add the drained tuna, cooked pasta, milk, and water to the skillet.
- Stir everything together and bring to a simmer.
Warning: Keep an eye on the milk to prevent it from scorching. A gentle simmer is what we’re after!
Step 4 – Let It Thicken
- Reduce the heat and let the mixture thicken for about 5-7 minutes.
- Stir in the shredded cheese and frozen peas.
- Season with salt and pepper to taste.
Step 5 – Final Touch
- Continue to cook until everything is heated through and the cheese is melted.
- Give it a final taste and adjust the seasoning if necessary.
Additional Tips
- For a gluten-free version, use gluten-free pasta and check all your ingredient labels.
- Boost the fiber content by adding a handful of chopped spinach or kale during the last few minutes of cooking.
Pairing Suggestions
This dish is quite versatile. Here are a few ideas on how to serve it:
- A simple green salad with a lemon vinaigrette
- Garlic bread or soft dinner rolls
Nutritional Information
| Nutrient | Amount per serving |
|---|---|
| Calories | 480 kcal |
| Protein | 28 g |
| Carbohydrates | 54 g |
| Fat | 18 g |
| Sodium | 490 mg |
| Fiber | 3 g |
Approximation Note: Nutritional values are estimates and can vary based on specific brands of ingredients used.
Dietary Information
This tuna helper is wonderfully adaptable. Here’s how you can tweak it:
- Vegetarian: Swap tuna for canned chickpeas.
- Low-Carb: Use low-carb pasta or spiralized vegetables.
FAQs about Tuna Helper
Why is my Tuna Helper dry?
To keep your tuna helper moist and creamy, ensure not to overcook the pasta and maintain a gentle simmer when combining ingredients. Adding a splash more milk can also help.
Can I store and reheat this dish?
Absolutely! Store it in an airtight container in the refrigerator for up to 3 days. Reheat gently, adding a little milk to bring back the creaminess.
What makes this Tuna Helper healthier?
By controlling the ingredients, like using fresh produce and less salt, you make a healthier version than store-bought alternatives.
Can I add other vegetables to this recipe?
Yes, feel free to add bell peppers, carrots, or even mushrooms to this dish to increase its nutritional value and fiber content.
How can I make my Tuna Helper cheesier?
If you love cheese, feel free to add more cheddar or even mix in some mozzarella or Parmesan for extra flavor and gooeyness.
Is Tuna Helper suitable for a ketogenic diet?
By substituting regular pasta with low-carb alternatives, this dish can easily fit into a ketogenic lifestyle.
Can I make this dish ahead of time?
Yes, you can prepare this dish ahead of time and simply reheat it when ready to serve. It’s a great way to save time on busy weekdays!
Conclusion
This tuna helper recipe is not just about satisfying hunger; it’s about creating a meal that will bring smiles to the dinner table. It’s quick, it’s easy, and most importantly, it’s absolutely delicious. Give it a try and tweak it to your liking – the kitchen is your playground!
I’d love to hear how it turned out for you! Feel free to leave comments, questions, or any feedback you might have about this recipe.
Check out some more delicious main dish recipes:
- Keto Pasta Recipe
- Cavatelli Pasta Recipe
- Grilled Chicken Chinks Recipe
- Italian Hoagie Meats Recipe
- Smoked Pot Roast Recipe
- Shrimp Parmesan Recipe

Tuna Helper Recipe
Equipment
- Large skillet
- Measuring cups and spoons
- Wooden spoon or spatula
- Strainer
Ingredients
- 2 cans – Canned tuna drained
- 2 cups – Pasta elbow macaroni or similar
- 1 cup – Milk
- 1 cup – Water
- 2 tablespoons – Butter
- 1 cup – Cheddar cheese shredded
- 1 cup – Frozen peas
- 1 teaspoon – Onion powder
- 1 teaspoon – Garlic powder
- To taste – Salt
- To taste – Pepper
Instructions
Step 1 – Prep the Pasta
- Cook the pasta according to package instructions until it’s just al dente. Remember, it’s going to cook a bit more when we mix it with the sauce.
- Note: Always salt your pasta water – it’s your only chance to flavor the pasta itself!
Step 2 – Sauté the Spices
- In the same skillet, melt the butter over medium heat.
- Add the onion and garlic powder, sautéing until fragrant. This will form the flavor base of our dish.
Step 3 – Combine Ingredients
- Add the drained tuna, cooked pasta, milk, and water to the skillet.
- Stir everything together and bring to a simmer.
- Warning: Keep an eye on the milk to prevent it from scorching. A gentle simmer is what we’re after!
Step 4 – Let It Thicken
- Reduce the heat and let the mixture thicken for about 5-7 minutes.
- Stir in the shredded cheese and frozen peas.
- Season with salt and pepper to taste.
Step 5 – Final Touch
- Continue to cook until everything is heated through and the cheese is melted.
- Give it a final taste and adjust the seasoning if necessary.
Notes
- For a gluten-free version, use gluten-free pasta and check all your ingredient labels.
- Boost the fiber content by adding a handful of chopped spinach or kale during the last few minutes of cooking.


Leave a Reply