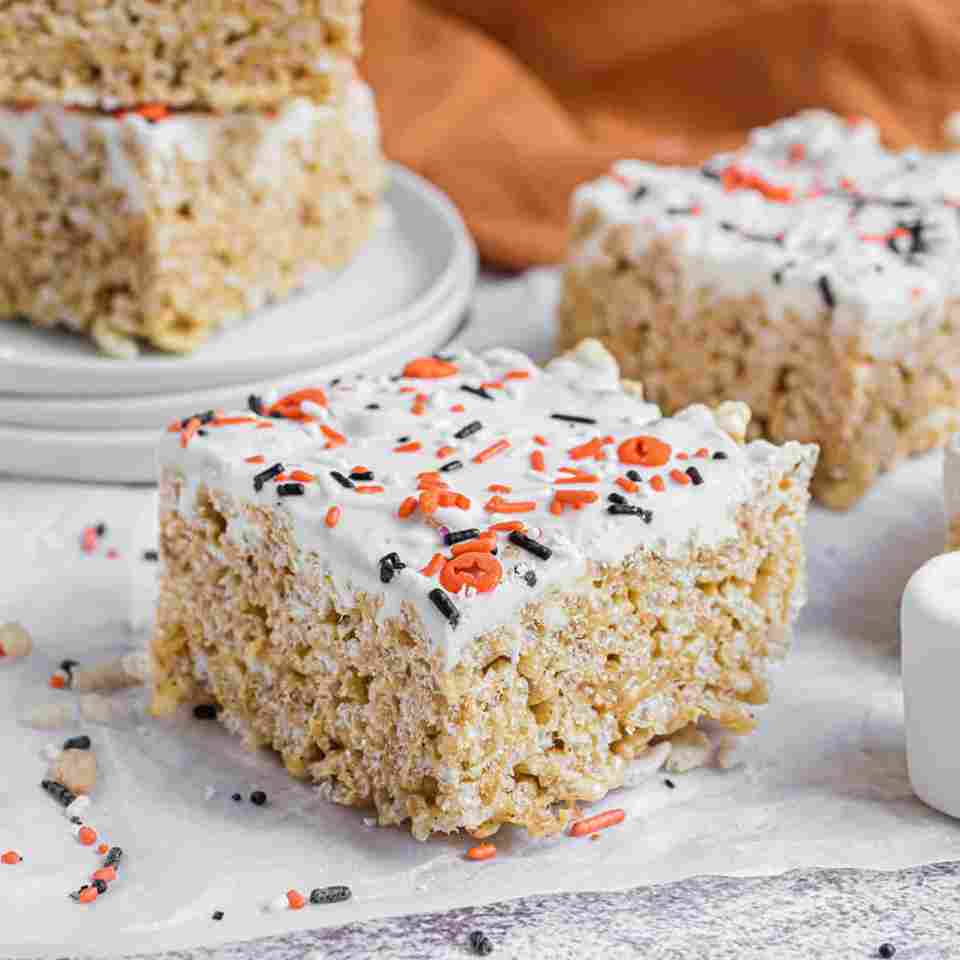
I’ve made plenty of treats in my time, but nothing brings me back to the joys of childhood quite like a classic rice krispie treat. These gooey, crispy squares are a simple pleasure, yet there’s an art to making them just right. Today, I’m sharing my ultimate guide to crafting the perfect rice krispie treat recipe, ensuring every bite is as nostalgic as it is delicious.

Recipe Overview
- Course: Dessert
- Cuisine: American
- Total Servings: 12
- Prep Time: 10 minutes
- Cook Time: 10 minutes
- Total Time: 20 minutes
Kitchen Equipment Needed
Before you start, you’ll need a few basic pieces of kitchen equipment to make your rice krispie treat recipe:
- Large saucepan
- Spatula
- Measuring cups and spoons
- 9×13 inch baking dish
- Parchment paper or non-stick spray
Ingredients
| Ingredient | Quantity |
|---|---|
| Butter | 4 tablespoons |
| Mini marshmallows | 6 cups |
| Vanilla extract | 1 teaspoon |
| Salt | 1/4 teaspoon |
| Rice Krispies cereal | 6 cups |
Did you know? Marshmallows were once made from the root of the marshmallow plant, which was believed to have medicinal properties!
Step by Step Instructions
Step 1 – Melt the Butter
- Melt the butter in a large saucepan over low heat.
- Ensure the butter is fully melted but not browned.
Note: Using low heat is key to prevent the butter from burning, which can affect the flavor.
Step 2 – Add Marshmallows
- Add marshmallows to the melted butter.
- Stir continuously until the marshmallows are completely melted and the mixture is smooth.
Warning: Keep stirring to avoid the marshmallows sticking and burning at the bottom.
Step 3 – Mix in Vanilla and Salt
- Remove the saucepan from heat.
- Stir in the vanilla extract and salt until well combined.
Fact: Vanilla enhances the flavor of the marshmallows, giving your treats a richer taste!
Step 4 – Add Rice Krispies
- Gradually add the Rice Krispies cereal to the marshmallow mixture.
- Gently fold the cereal into the marshmallow mixture until well coated.
Note: Be gentle to keep the cereal from crushing and maintain that perfect crunch.
Step 5 – Press into Pan
- Transfer the mixture to a 9×13 inch baking dish lined with parchment paper or sprayed with non-stick spray.
- Press down evenly, ensuring the mixture is compact and flat.
Tip: Use a piece of wax paper or a spatula sprayed with non-stick spray to press down the mixture easily without sticking.
Additional Tips
- For a fun twist, mix in chocolate chips, peanut butter, or candy pieces with the Rice Krispies.
- If you like your treats extra gooey, add an extra cup of marshmallows.
Pairing Suggestions
Rice krispie treats are incredibly versatile. Here are a few ways to jazz them up:
- Drizzle with chocolate or caramel sauce.
- Top with sprinkles or crushed cookies for added texture.
Nutritional Information
| Nutrient | Amount per Serving |
|---|---|
| Calories | 150 |
| Total Fat | 3.5g |
| Saturated Fat | 2.1g |
| Cholesterol | 10mg |
| Sodium | 70mg |
| Total Carbohydrates | 27g |
| Dietary Fiber | 0g |
| Sugars | 15g |
| Protein | 1g |
Approximation Note: These values are approximate and can vary based on specific ingredient choices.
Dietary Information
This rice krispie treat recipe is perfect for those following a vegetarian diet. To adapt for gluten-sensitive individuals, ensure your rice krispies are gluten-free.
FAQs about Rice Krispie Treat Recipe
How can I make my rice krispie treats vegan?
To make them vegan, use plant-based butter and marshmallows that don’t contain animal-derived gelatin.
What’s the best way to store rice krispie treats?
Keep them in an airtight container at room temperature. They’ll stay fresh for up to 3 days.
Can I freeze rice krispie treats?
Yes, you can freeze them for up to 6 weeks. Just make sure they’re well wrapped or in a sealed container.
Why are my rice krispie treats too hard?
If they’re too hard, you may have pressed them into the pan too firmly. Next time, gently press them just enough to shape.
How do I prevent my rice krispie treats from sticking to the pan?
Line your pan with parchment paper or a good quality non-stick spray before adding the mixture.
Can I add other cereals instead of Rice Krispies?
Absolutely! Feel free to experiment with different cereals for new textures and flavors.
What can I do to make my rice krispie treats extra special?
Consider adding a layer of melted chocolate on top or mixing in your favorite nuts or dried fruits for a personalized touch.
Conclusion
There you have it, a foolproof rice krispie treat recipe that’s as fun to make as it is to eat. These treats are not only a hit among kids but also adults who cherish a sweet bite of nostalgia.
Feel free to leave comments, questions, or your own twists on this classic recipe below. I love hearing how you make these treats your own!
Check out some more delicious dessert recipes:
- Carlota de Limon Recipe
- Nestle Toll House Cookie Recipe
- Bisquick Strawberry Shortcake Recipe
- Gluten Free Puff Pastry Recipe
- Churro Cheesecake Recipe
- Oreo Mug Cake Recipe

Rice Krispie Treat Recipe
Equipment
- Large saucepan
- Spatula
- Measuring cups and spoons
- 9×13 inch baking dish
- Parchment paper or non-stick spray
Ingredients
- 4 tablespoons Butter
- 6 cups Mini marshmallows
- 1 teaspoon Vanilla extract
- 1/4 teaspoon Salt
- 6 cups Rice Krispies cereal
Instructions
Step 1 – Melt the Butter
- Melt the butter in a large saucepan over low heat.
- Ensure the butter is fully melted but not browned.
- Note: Using low heat is key to prevent the butter from burning, which can affect the flavor.
Step 2 – Add Marshmallows
- Add marshmallows to the melted butter.
- Stir continuously until the marshmallows are completely melted and the mixture is smooth.
- Warning: Keep stirring to avoid the marshmallows sticking and burning at the bottom.
Step 3 – Mix in Vanilla and Salt
- Remove the saucepan from heat.
- Stir in the vanilla extract and salt until well combined.
- Fact: Vanilla enhances the flavor of the marshmallows, giving your treats a richer taste!
Step 4 – Add Rice Krispies
- Gradually add the Rice Krispies cereal to the marshmallow mixture.
- Gently fold the cereal into the marshmallow mixture until well coated.
- Note: Be gentle to keep the cereal from crushing and maintain that perfect crunch.
Step 5 – Press into Pan
- Transfer the mixture to a 9×13 inch baking dish lined with parchment paper or sprayed with non-stick spray.
- Press down evenly, ensuring the mixture is compact and flat.
- Tip: Use a piece of wax paper or a spatula sprayed with non-stick spray to press down the mixture easily without sticking.
Notes
- For a fun twist, mix in chocolate chips, peanut butter, or candy pieces with the Rice Krispies.
- If you like your treats extra gooey, add an extra cup of marshmallows.


Leave a Reply