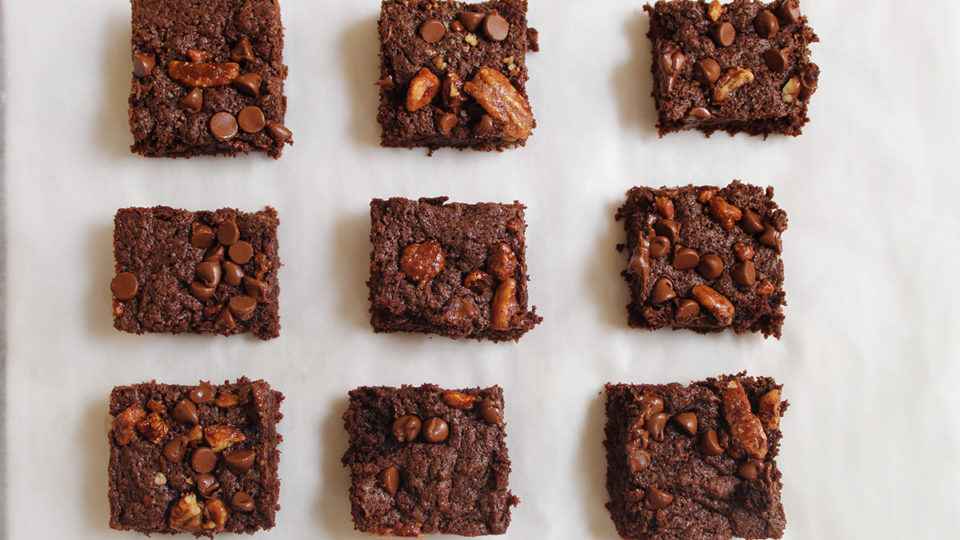
Gone are the days when eating healthy meant saying goodbye to desserts. Let me tell you, it’s absolutely possible to enjoy a decadent dessert and still stick to your fitness goals. These protein brownies I’m about to walk you through are not just packed with flavor but also with protein. They are the perfect treat for anyone looking to keep their protein intake up without compromising on taste.

Protein Brownies Recipe Overview
- Course: Dessert
- Cuisine: American
- Total Servings: 12
- Prep Time: 15 minutes
- Cook Time: 20 minutes
- Total Time: 35 minutes
Kitchen Equipment Needed
When you’re ready to make these protein brownies, make sure you have the following tools:
- Mixing bowls
- Measuring cups and spoons
- Baking dish (8×8 or similar)
- Oven
- Cooling rack
Ingredients
Here’s what you’ll need for these protein-packed treats. I’ve listed them in a clear and concise table to make your prep as smooth as possible.
| Ingredient | Quantity |
|---|---|
| Whey protein powder (chocolate) | 1 scoop |
| Almond flour | 1 cup |
| Cocoa powder | 1/4 cup |
| Baking powder | 1 tsp |
| Salt | 1/4 tsp |
| Eggs | 2 large |
| Unsweetened applesauce | 1/2 cup |
| Maple syrup | 1/4 cup |
| Vanilla extract | 1 tsp |
| Chocolate chips (dark, 70% cacao) | 1/2 cup |
Fact: Did you know that dark chocolate is not only delicious but also packed with antioxidants? It’s a great addition to any dessert, adding both flavor and health benefits!
Step by Step Instructions
Step 1 – Prepare Your Ingredients
- Preheat your oven to 350°F (175°C).
- Grease your baking dish lightly or line it with parchment paper.
Ensure all your ingredients are at room temperature to mix better.
Step 2 – Mix Dry Ingredients
- In a medium bowl, whisk together almond flour, cocoa powder, protein powder, baking powder, and salt.
Mixing your dry ingredients separately helps avoid clumping and ensures a uniform distribution in the batter.
Step 3 – Combine Wet Ingredients
- In another bowl, beat the eggs, applesauce, maple syrup, and vanilla extract until smooth.
Applesauce is a fantastic substitute for oil, providing moisture without extra fat!
Step 4 – Mix Everything Together
- Gradually add the dry ingredients to the wet ingredients, stirring until just combined. Avoid overmixing to keep the brownies tender.
- Fold in the chocolate chips.
A good mix is like a good marriage; everything comes together just right!
Step 5 – Bake
- Pour the batter into the prepared baking dish and smooth the top with a spatula.
- Bake in the preheated oven for 20 minutes or until a toothpick inserted in the center comes out clean.
Don’t overbake! Protein brownies can become tough if left in the oven too long.
Step 6 – Cool and Serve
- Let the brownies cool in the pan on a cooling rack for at least 10 minutes.
- Cut into squares and serve.
Patience is key – letting them cool completely allows for easier cutting!
Additional Tips
- If you’re using a different type of protein powder (like plant-based), you might need to adjust the liquid in the recipe slightly as each type absorbs moisture differently.
- These brownies can be stored in an airtight container at room temperature for up to 3 days, or frozen for longer storage.
Pairing Suggestions
These brownies are a treat on their own, but here are some pairing ideas to elevate your experience:
- Serve with a scoop of low-fat Greek yogurt for an extra protein boost.
- A drizzle of peanut butter can add a delicious twist.
Nutritional Information
| Nutrient | Amount per serving |
|---|---|
| Calories | 150 kcal |
| Protein | 10 g |
| Carbohydrates | 18 g |
| Fat | 7 g |
| Fiber | 3 g |
| Sugar | 8 g |
Approximation Note: Nutritional values are estimates and can vary based on specific ingredient choices and portion sizes.
Dietary Information
These brownies are a fantastic option for those following a gluten-free diet. To make them vegan, substitute eggs with flax eggs and use a plant-based protein powder.
FAQs about Protein Brownies
What can I use instead of almond flour?
You can use coconut flour, but keep in mind it absorbs more liquid, so you’ll need to adjust accordingly.
Can I make these brownies nut-free?
Absolutely! Substitute almond flour with oat flour for a nut-free version.
How do I make my brownies fudgier?
Reduce the cooking time slightly and add an extra tablespoon of applesauce.
Can I add fruits to the recipe?
Yes, try folding in some raspberries or diced apples for a fruity twist.
Are these brownies freezer-friendly?
Yes, they freeze well. Wrap them individually and freeze for up to 3 months.
How can I increase the protein content?
Add a scoop of your favorite protein powder or serve with a protein-rich topping like Greek yogurt.
Can I use honey instead of maple syrup?
Yes, honey works well as a substitute for maple syrup in this recipe.
Conclusion
These protein brownies are the perfect blend of nutritious and delicious. They prove that you don’t have to sacrifice flavor for health. Give them a try, and I’m sure they’ll become a staple in your home.
I’d love to hear your thoughts on this recipe. Feel free to leave comments, questions, or feedback below. Your interaction is what keeps these recipes lively and engaging!
Check out some more delicious dessert recipes:
- Strawberry Crunch Cake Recipe
- Chocolate Coffee Cake Recipe
- Hazelnut Tartufo Recipe
- Bourbon Creme Brulee Recipe
- Pie Charlotte Recipe: The Ultimate Classic Dessert
- 2 Ingredient Peanut Butter Frosting Recipe

Protein Brownies Recipe
Equipment
- Mixing bowls
- Measuring cups and spoons
- Baking dish (8×8 or similar)
- Oven
- Cooling rack
Ingredients
- 1 scoop Whey protein powder chocolate
- 1 cup Almond flour
- 1/4 cup Cocoa powder
- 1 tsp Baking powder
- 1/4 tsp Salt
- 2 large Eggs
- 1/2 cup Unsweetened applesauce
- 1/4 cup Maple syrup
- 1 tsp Vanilla extract
- 1/2 cup Chocolate chips dark, 70% cacao
Instructions
Step 1 – Prepare Your Ingredients
- Preheat your oven to 350°F (175°C).
- Grease your baking dish lightly or line it with parchment paper.
- Ensure all your ingredients are at room temperature to mix better.
Step 2 – Mix Dry Ingredients
- In a medium bowl, whisk together almond flour, cocoa powder, protein powder, baking powder, and salt.
- Mixing your dry ingredients separately helps avoid clumping and ensures a uniform distribution in the batter.
Step 3 – Combine Wet Ingredients
- In another bowl, beat the eggs, applesauce, maple syrup, and vanilla extract until smooth.
- Applesauce is a fantastic substitute for oil, providing moisture without extra fat!
Step 4 – Mix Everything Together
- Gradually add the dry ingredients to the wet ingredients, stirring until just combined. Avoid overmixing to keep the brownies tender.
- Fold in the chocolate chips.
- A good mix is like a good marriage; everything comes together just right!
Step 5 – Bake
- Pour the batter into the prepared baking dish and smooth the top with a spatula.
- Bake in the preheated oven for 20 minutes or until a toothpick inserted in the center comes out clean.
- Don’t overbake! Protein brownies can become tough if left in the oven too long.
Step 6 – Cool and Serve
- Let the brownies cool in the pan on a cooling rack for at least 10 minutes.
- Cut into squares and serve.
- Patience is key – letting them cool completely allows for easier cutting!
Notes
- If you’re using a different type of protein powder (like plant-based), you might need to adjust the liquid in the recipe slightly as each type absorbs moisture differently.
- These brownies can be stored in an airtight container at room temperature for up to 3 days, or frozen for longer storage.


Leave a Reply